Lamchat Application Instructions for Android.
Completed By: Laminar Communications Pty Ltd
Completed For: LamChat Users
Author: Monique Marbach & Jenna Cowan Date Issued: 23 June 2021 Status: Delivered Classification: Public Distribution: Lamchat Users
1. Download the LamChat App
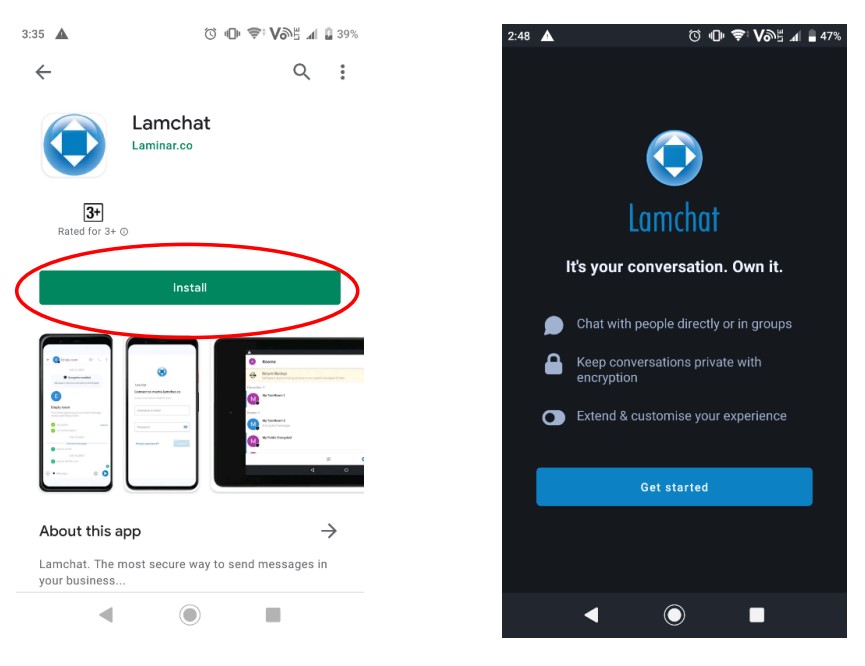
Go to the Play Store and search “LamChat“. Download the App by selecting Install. Once downloaded select “Open”. The App will open to the introduction page, select “Get Started”.
2. Create an Account
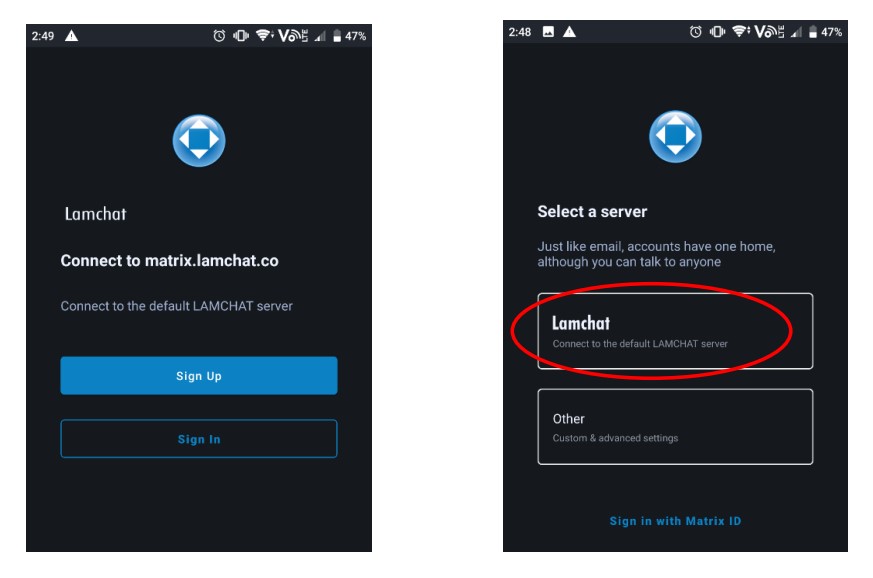
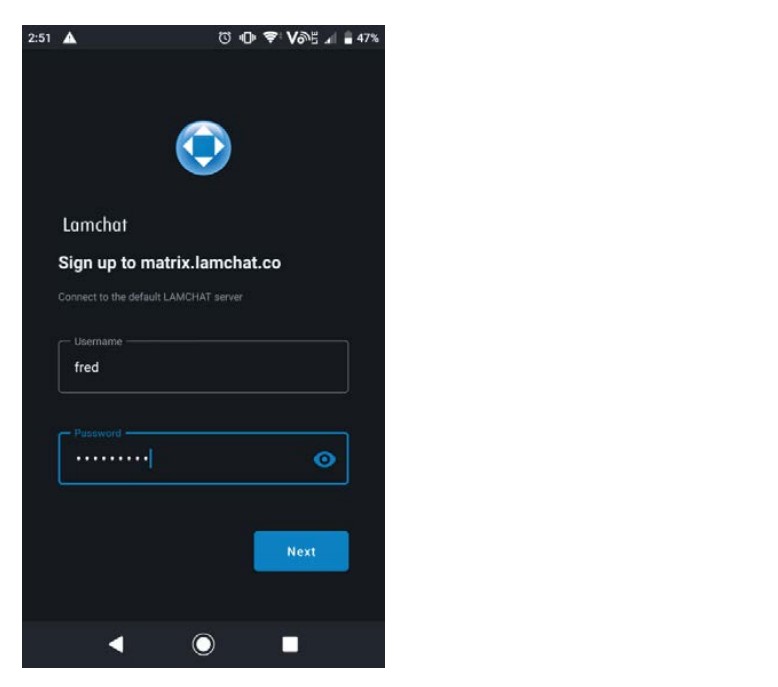
If you have already created an account sign into it by selecting “Sign In” and entering your details. To create a new account, select “Sign Up”. You will then need to select a server. Ensure you select LamChat.
On the next screen enter your details and select “Next”. Be aware that your username and password are both case sensitive.
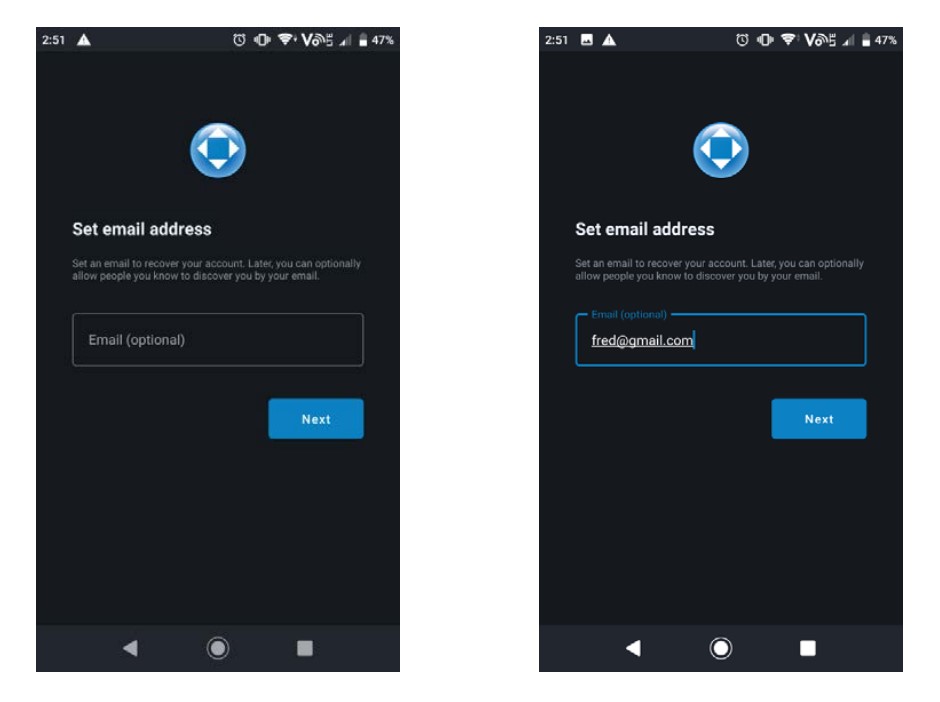
You will then need to set an email address to be attached to your account. This will assist with password recovery. Enter your preferred email address and select “Next”.
Next the screen below will appear. You will need to verify your email account.
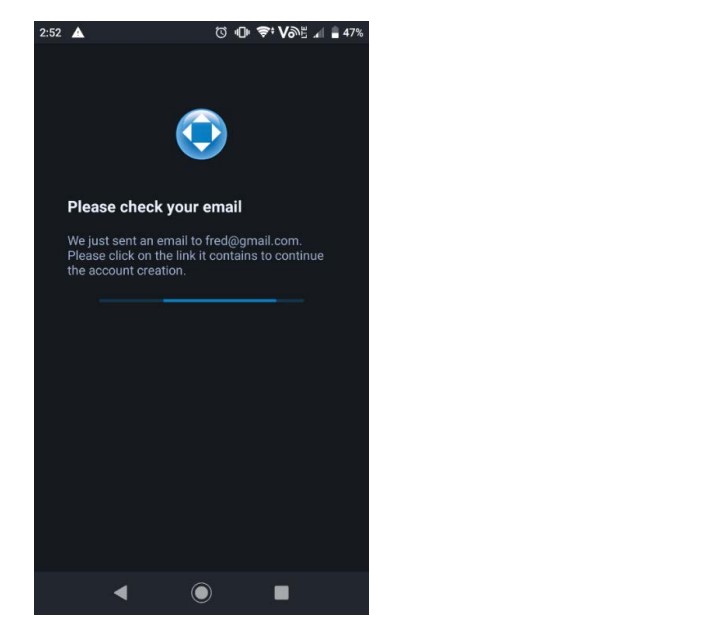
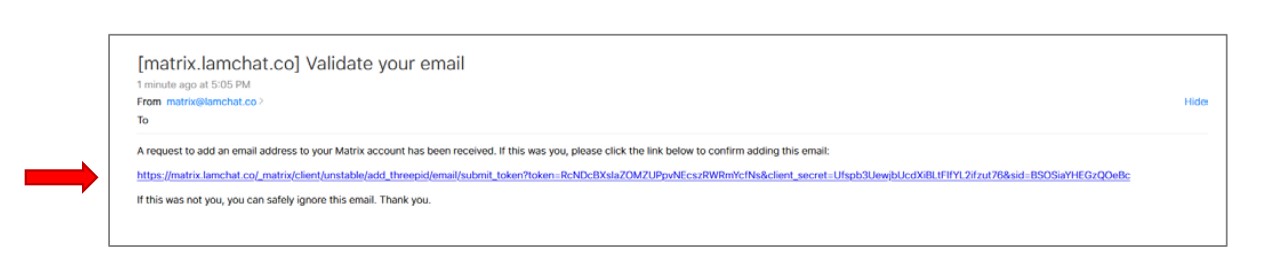
The email address you have entered will receive a confirmation email. Go to your email inbox and select the link as shown below. Once it is clicked it will activate the email to link it with your LamChat account.
Your screen will appear as below. You are now a registered user, Welcome to LamChat!
3. How to Chat
Whenever you start a chat with another LamChat user or start a Chat Room (a group chat), your chat/conversation will automatically be secure. Chats between Users are automatically created as an end to end secure room.
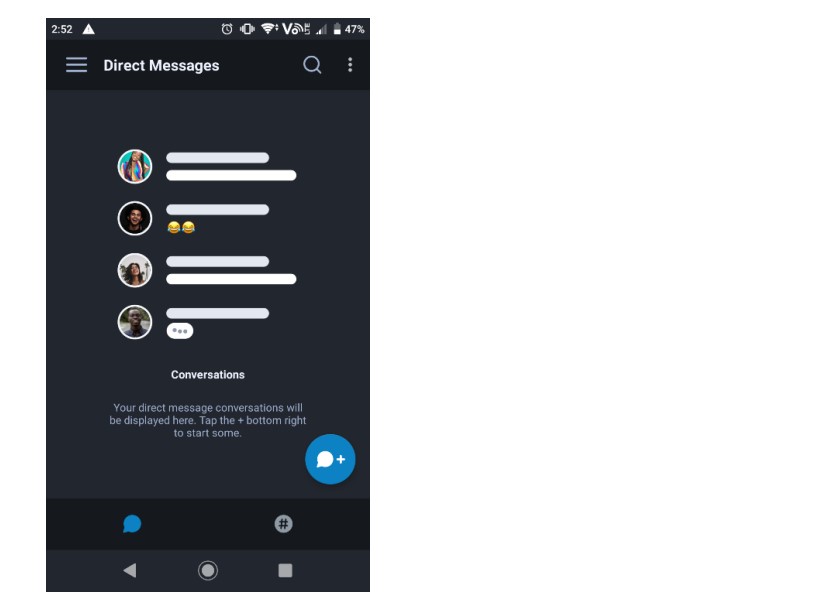
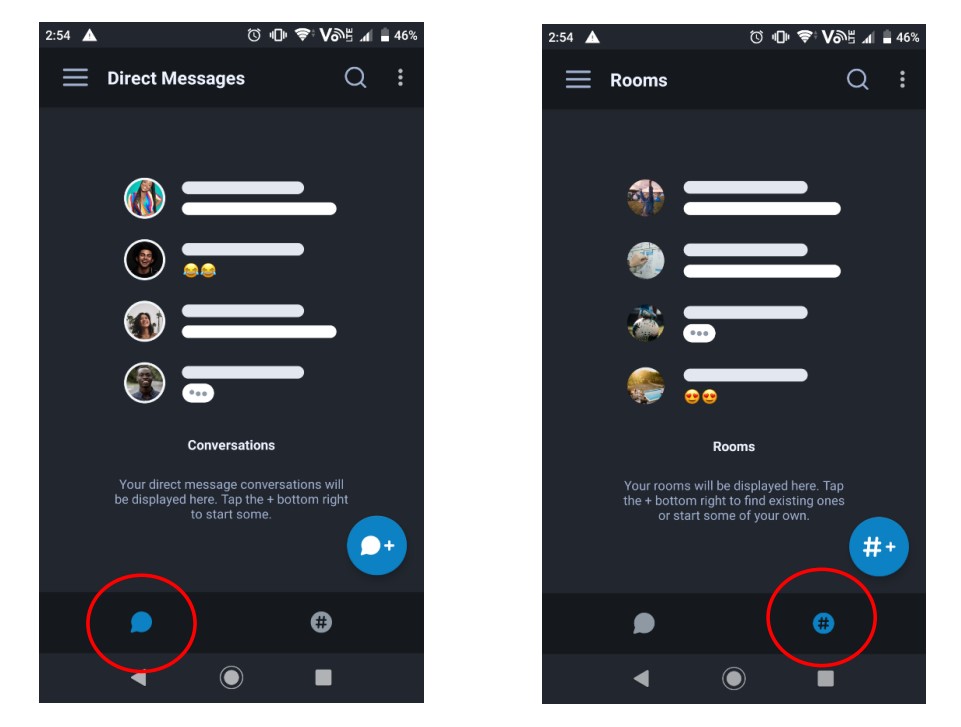
To get to individual Chats/Direct Messages select the message bubble shown below on the left. To get to Chat Rooms select the Hash button as shown below on the right.
3.1. Starting a Chat with an Individual
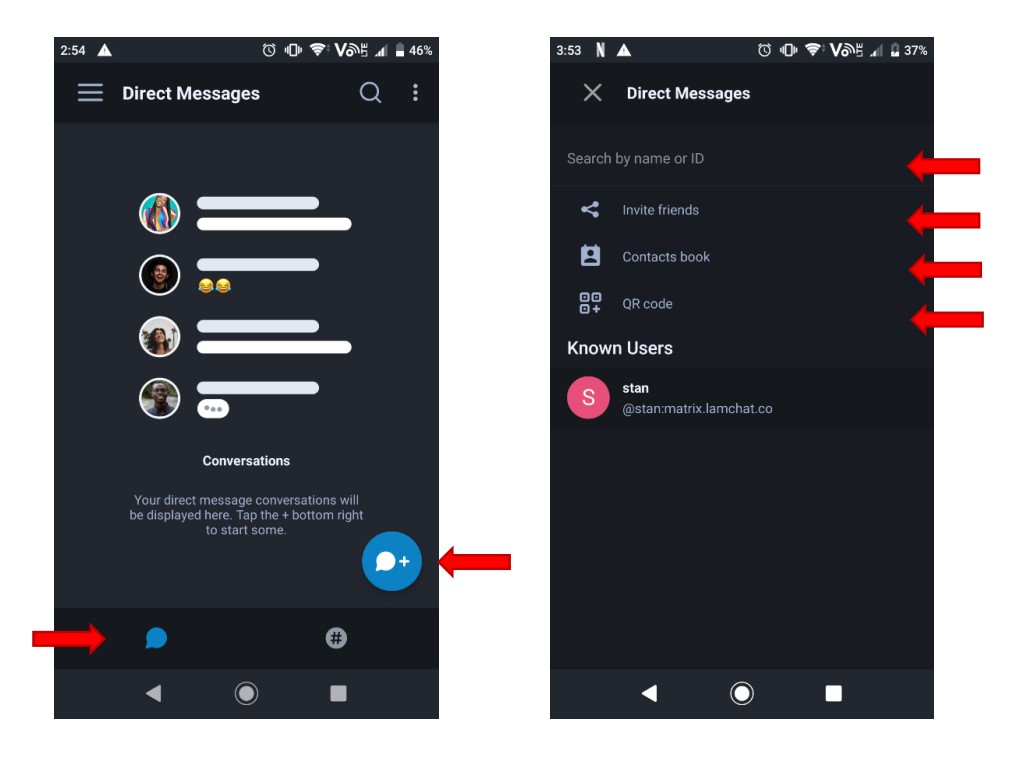
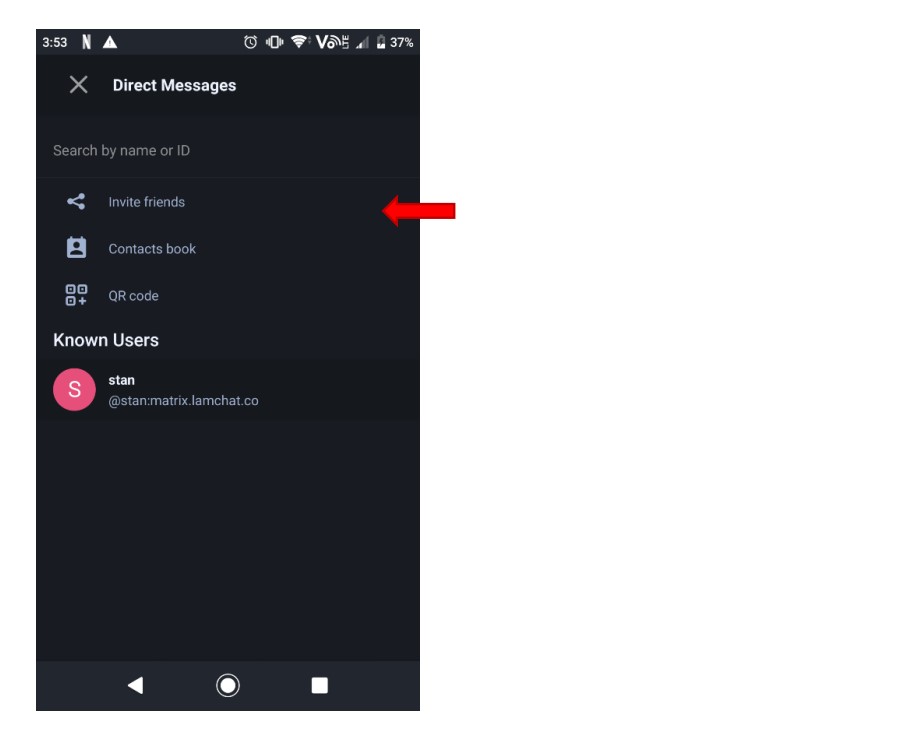
After selecting the message bubble, the below screen will appear. Select on the Blue Icon with the “message bubble and +“ to add other users. There are four ways you can add other users: 1. Search by Name or ID 2. Invite Friends 3. Contacts Book 4. QR code
3.2. Creating a Room (Group Chat)
After selecting the Hash button, the below screen will appear. Select on the Blue Icon with the “hash button and +“ to add new rooms. The screen will appear as below:

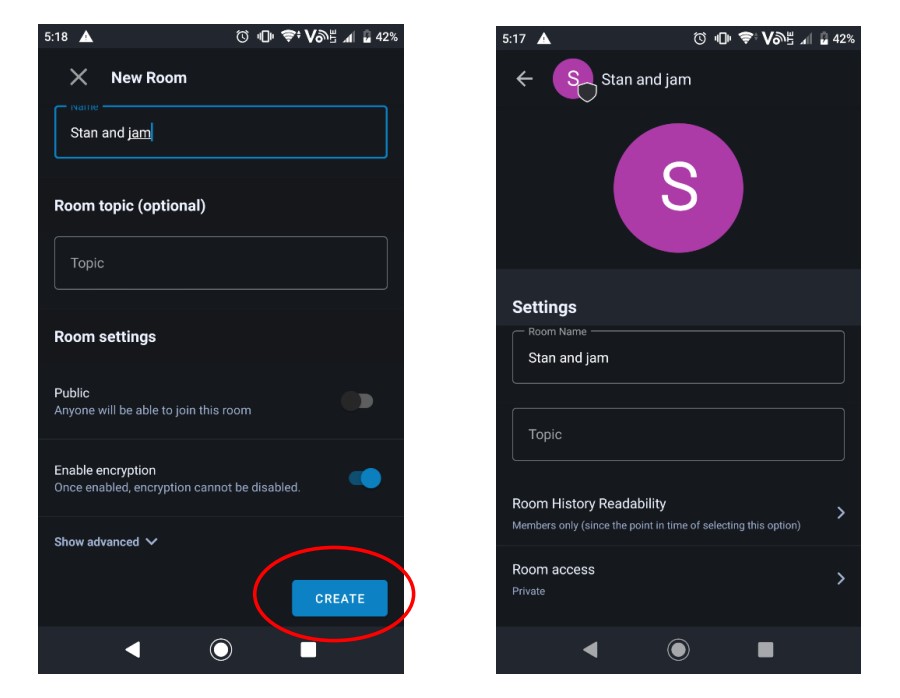
After selecting this button, the below screen will appear. Enter the “Room Name” and optionally you can add a “Room Topic”. The Room will automatically be created as a Private Room. Should you wish to create a Public Room then adjust the toggle under Room Settings. The Private Room can only be accessed by invitation whereas the Public Room everyone can look it up and invite themselves.
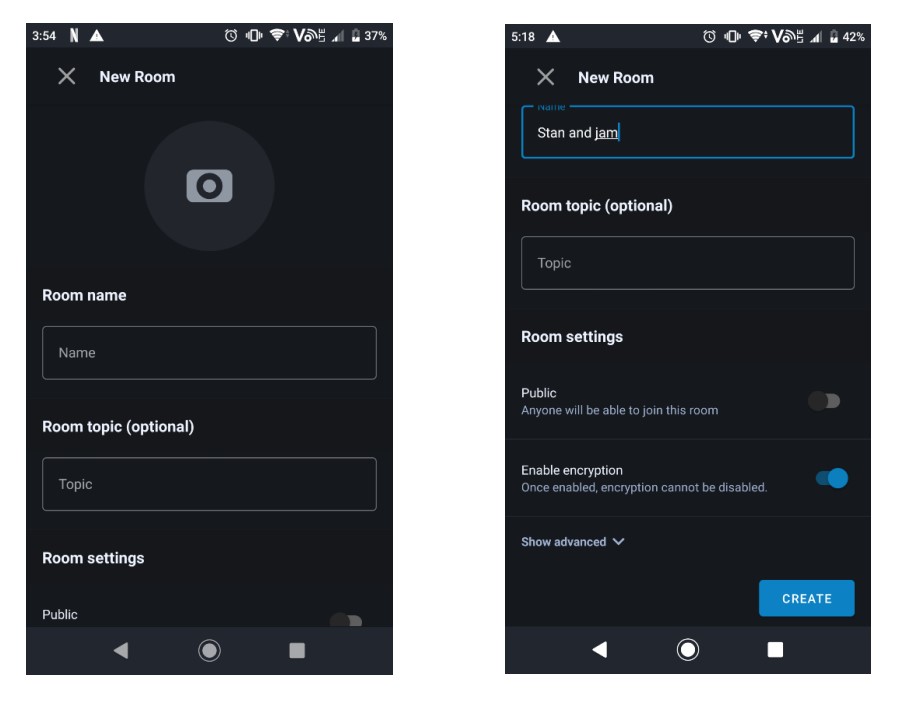
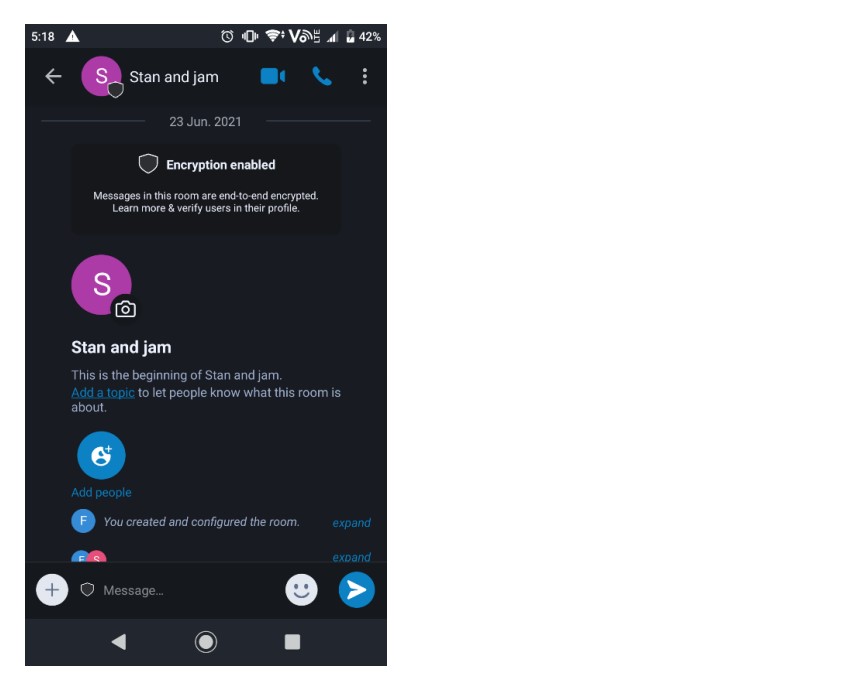
Select “Create” to start the room. An example shown below of a Private Room called Stan and jam.
3.2.1. Inviting People to a Room
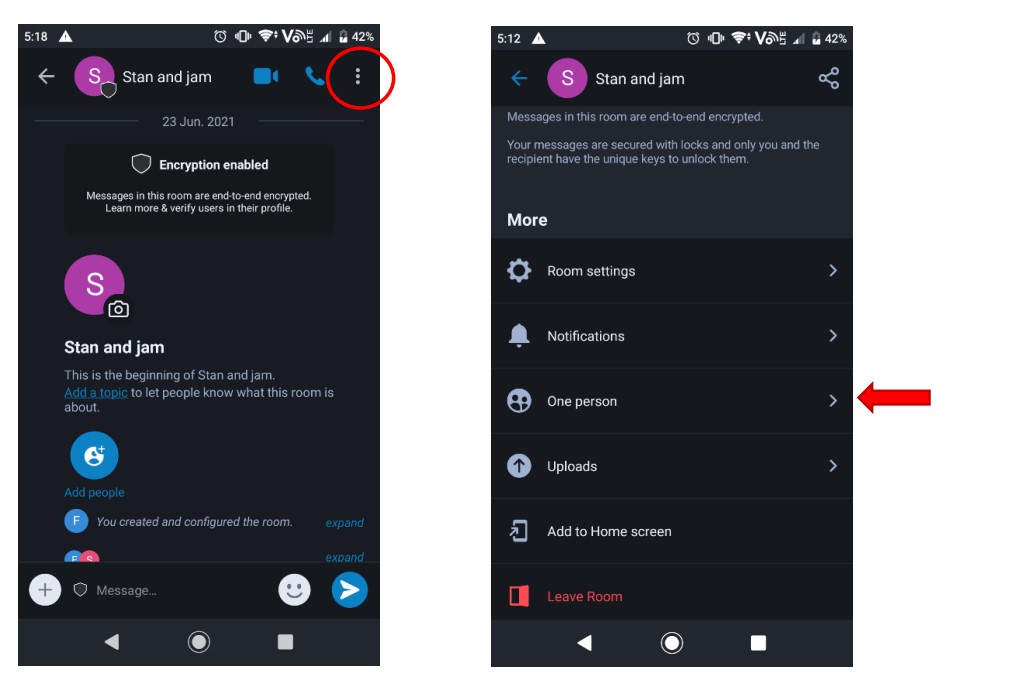
When you have created a new room or want to add people to an existing room select on the menu button in the top right hand corner that appears as three vertical dots. This will take you to the details of the Room. The third setting item will tell you the number of members. Select on this.
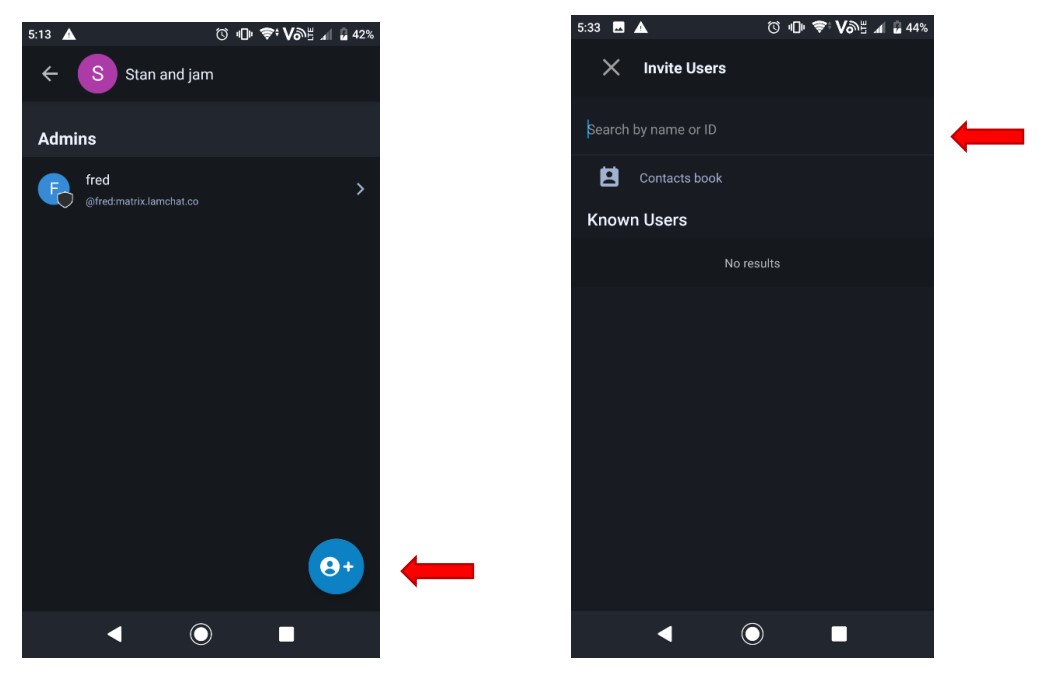
This screen will show you all the members and an “Add People” button will appear at the bottom right of your screen. Select on this. You can then search and invite people following the steps at “Starting a chat with an individual” explained at Section 3.1 however only “Search by Name or ID” and “Contacts Book” options are available. An example is shown below of the search screen.
You may receive a popup that confirms “User Invited”. The user will then appear in “Invites” until they accept the invitation. When they have accepted, they will appear under “Users” as shown below with Stan. When you exit the menu and return to the room you will also see a record of your invitation and who you invited.

You can add people who you have not started a chat with, however they will only appear in the Room they have accepted and will not appear on your “Direct Messages” list until you have started a direct chat with them.
3.3. Searching for Room (Group Chat)
After selecting the Rooms button you will need to select the magnifying glass in the top right hand corner to search for an existing Room. The below right screen will appear. To join a room, enter the Room ID or Room Name. Then select “Join”.

You can then search and invite people following the steps at “Inviting People to a room”.
Now you are setup in LamChat. For further details on the functions of the App please see the following pages. Happy Chatting!
4. Functions of the LamChat App
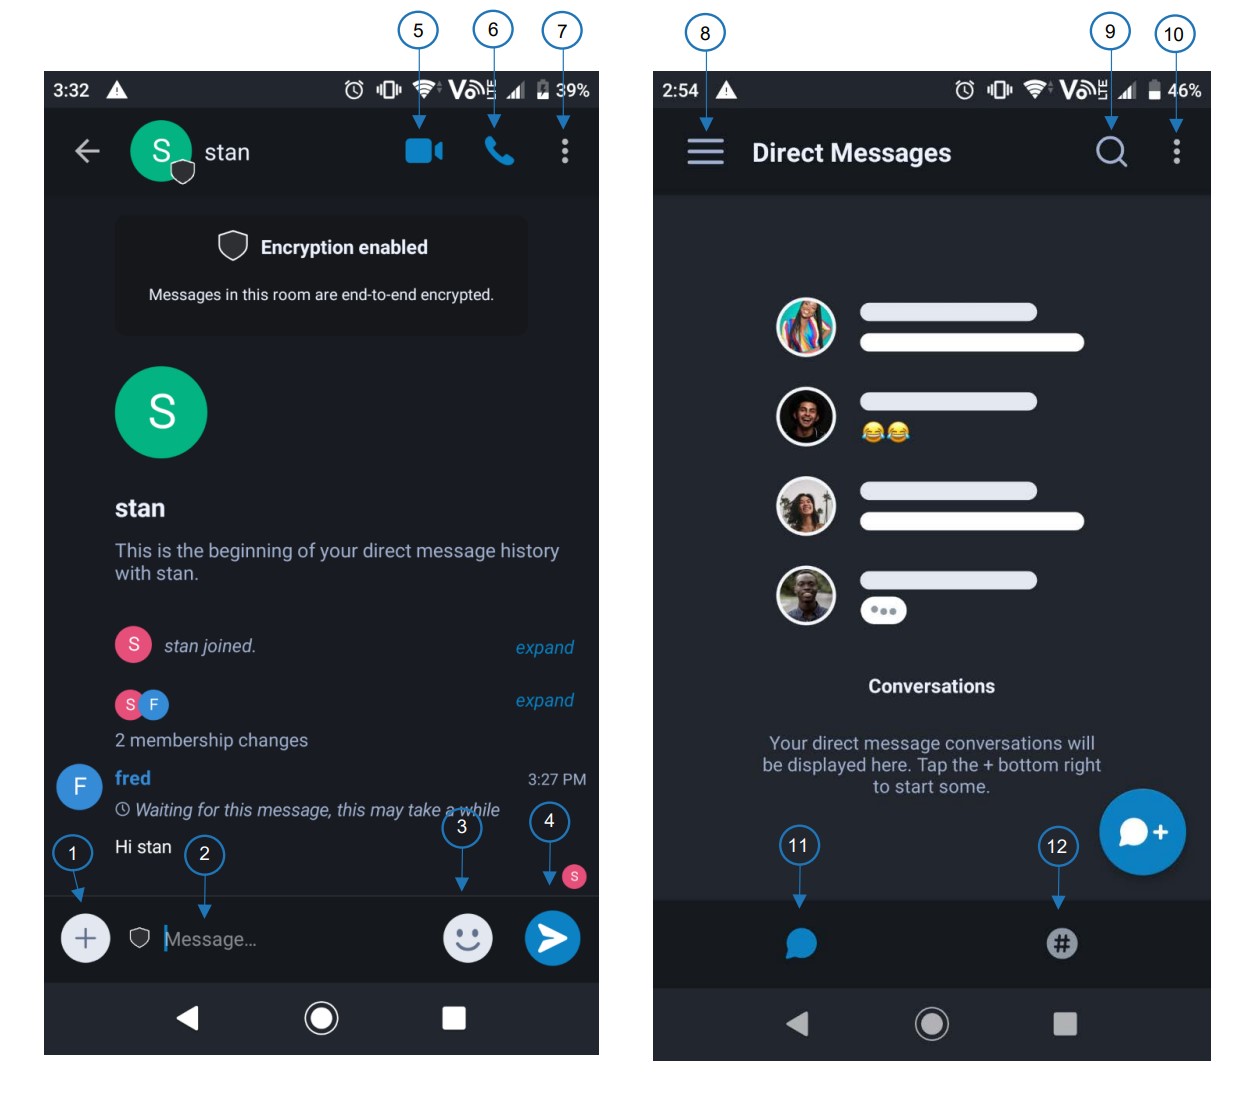
1. Take or send photo, sticker or file 2. Text bar, use send button to send 3. Send Emoji 4. Send Button 5. Video Chat 6. Call Chat 7. Menu – Chat 8. Profile Button / Profile Pane 9. Search Button 10. Menu 11. Direct Messages 12. Rooms
5. Linking Account for Password Recovery
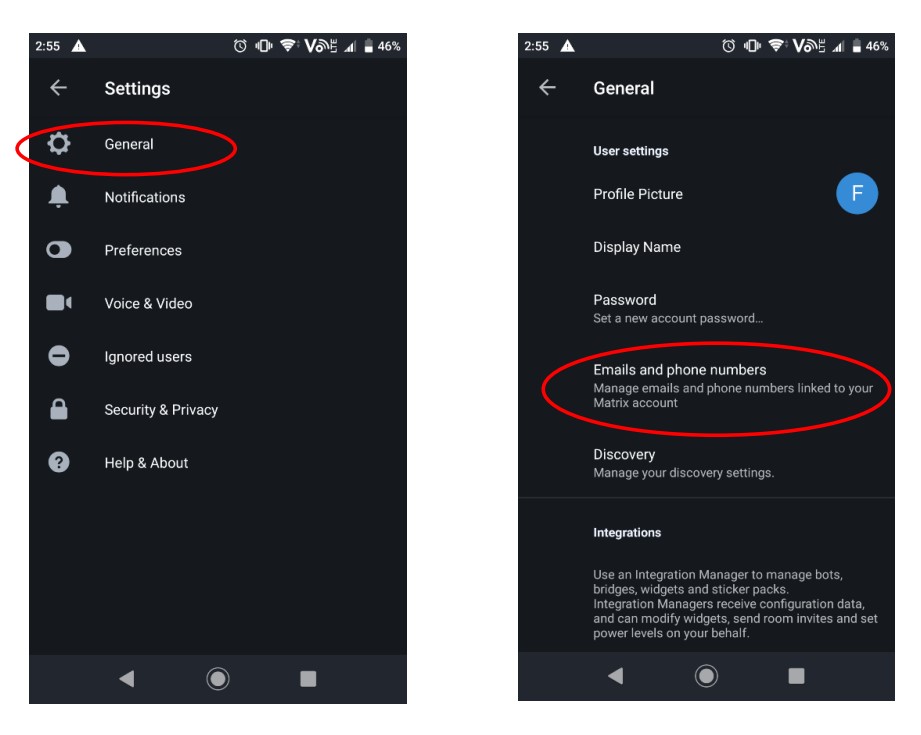
Linking an email address or phone number will allow for password recovery. If not linked upon creation an email can be added at a later time. In settings, go to General, and then Emails and Phone Numbers.
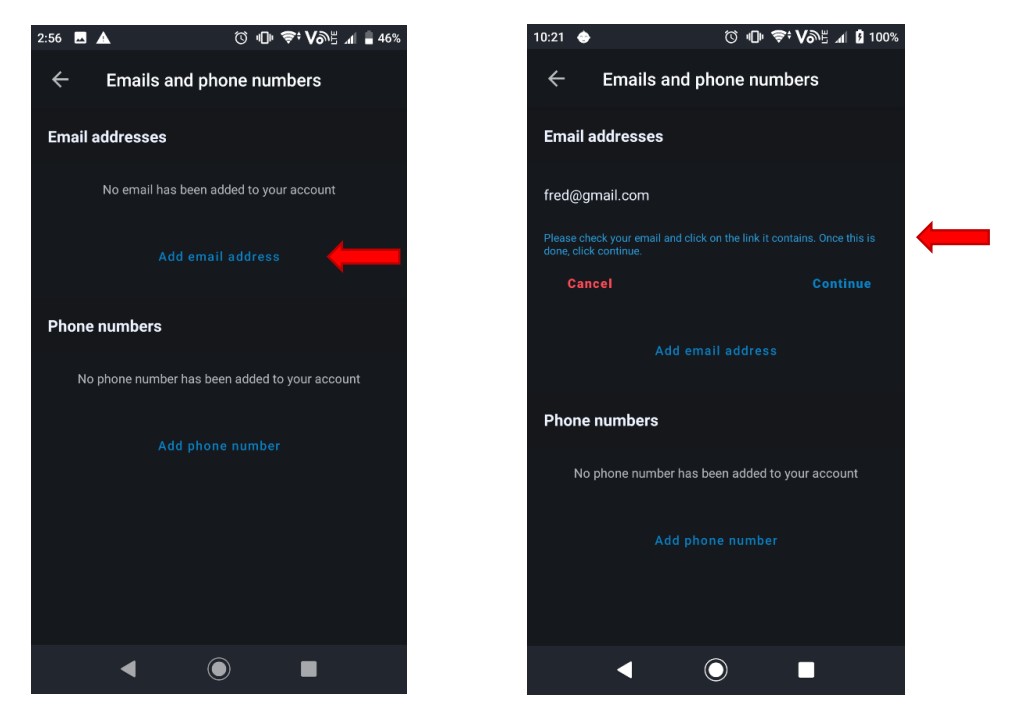
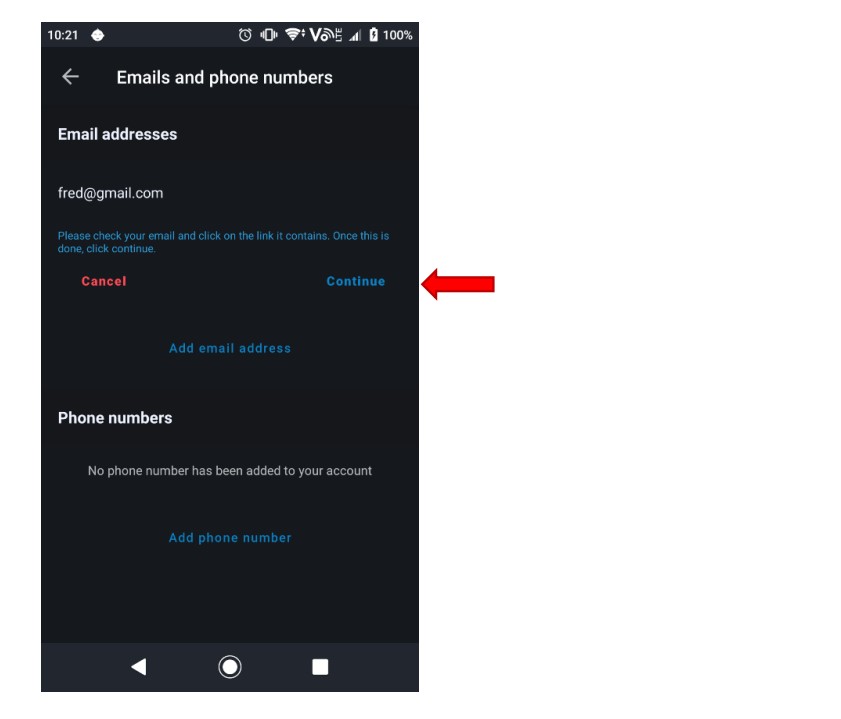
Select “Add email address”, enter your email address and you will then get a statement telling you to check your email address.
The email address you have entered will receive a confirmation email. Go to your email inbox and select the link as shown below. Once it is clicked it will activate the email to link it with your LamChat account.
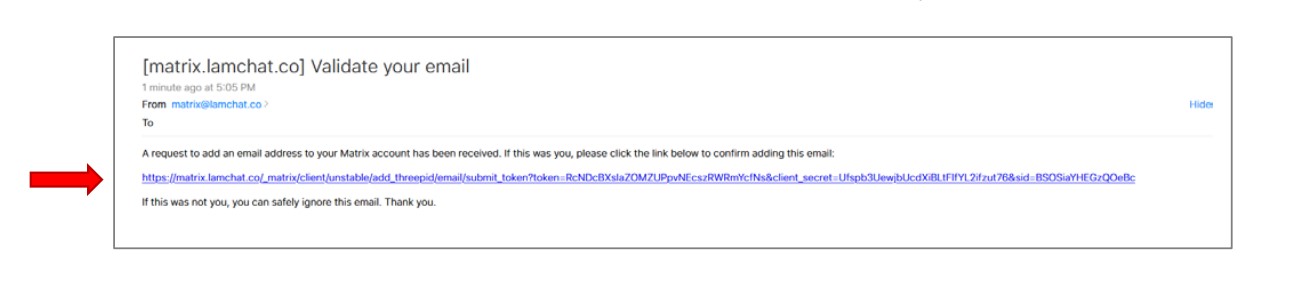
Then select “Continue” on the app and your email will now be linked.
6. Password Recovery
If an Email address has been linked the password can be changed. As your messages are encrypted, they will become unviewable. If you want to view any historic messages you will need to have setup your key backup per Secure Backup before carrying out the Password Recovery process. Select “Forgot password” then the Reset Password page will appear as below.
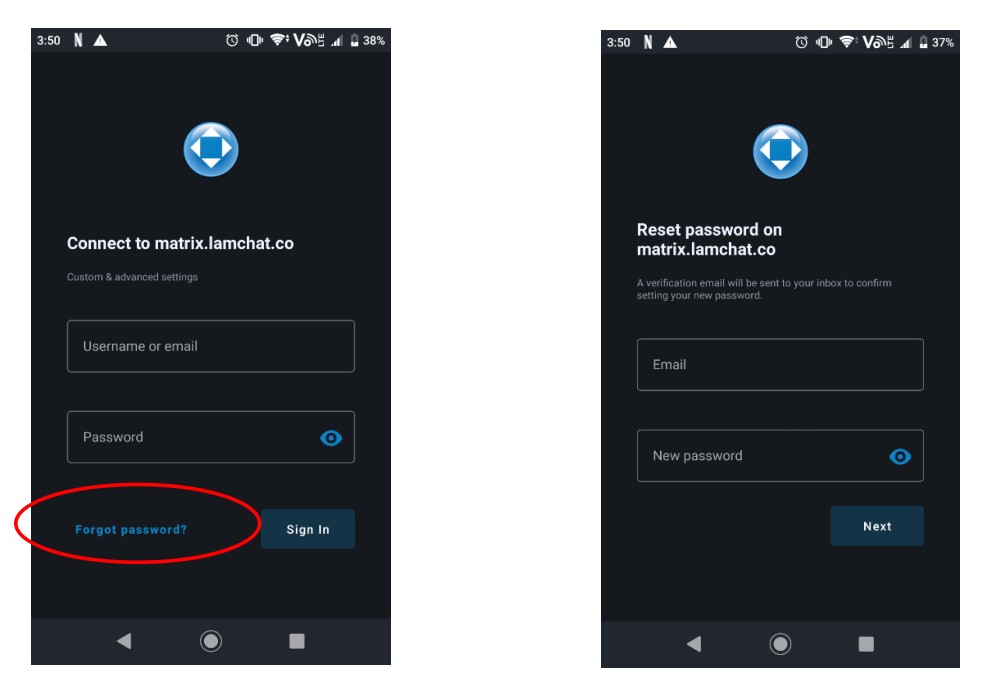
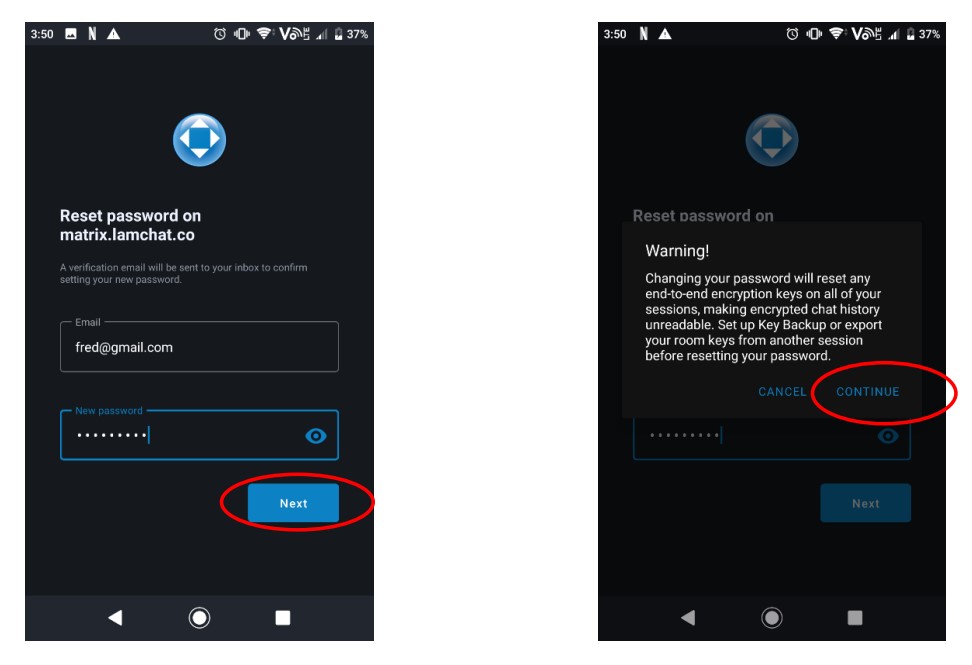
Enter your email address and new password then select “Next”. A warning will appear. If you have setup Key Backup or exported your Room Keys (Refer to Secure Backup) then you can select continue.
The below left screen will appear on your LamChat App. The email address you have entered will receive a reset your password email. Go to your email inbox and select the link as shown below on the right.
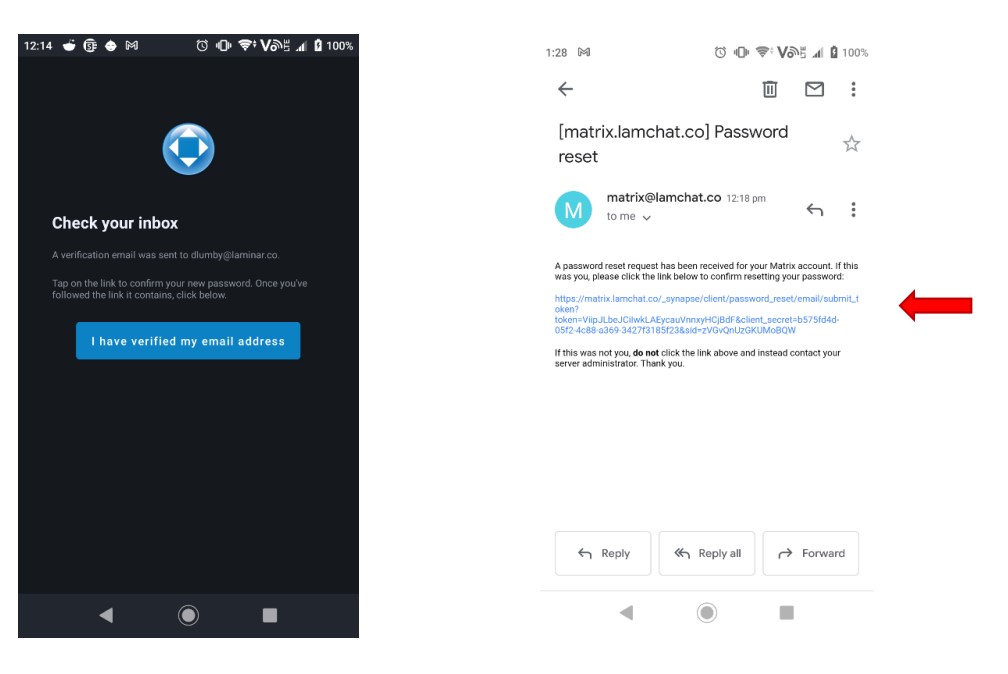
Once it is clicked a browser will open as shown below. Select the “Confirm changing my password” button.
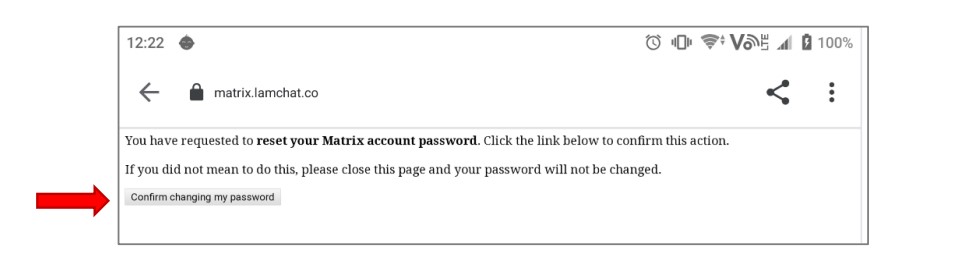
The below confirmation will then appear.
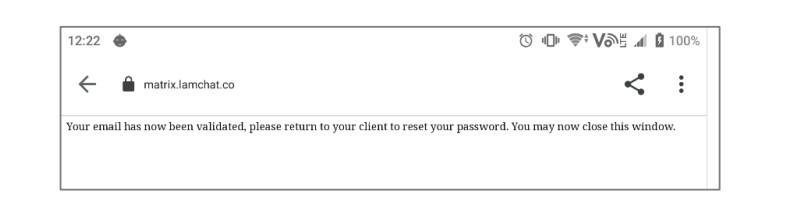
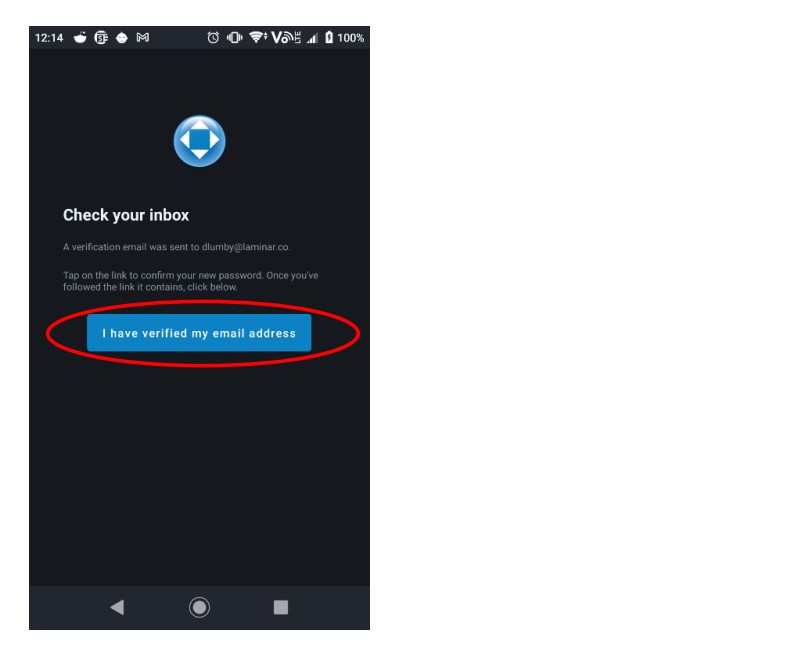
Return to the LamChat App and select “I have verified my email address” as shown below.
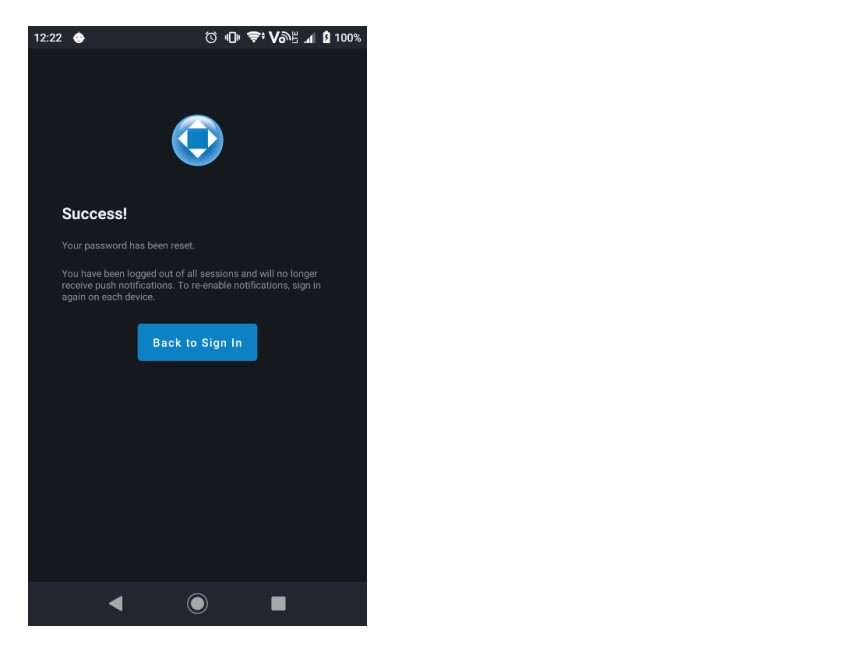
When you see the below screen, you have had success! Your new Password is now activated.
7. Verifying Account when using more than one device
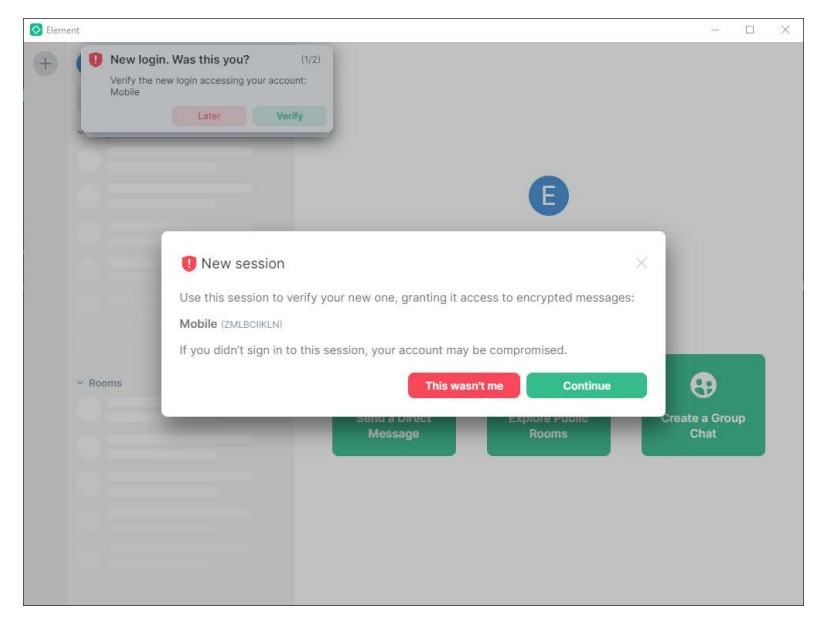
When logging into any secondary device for the first time (eg you have logged in on LamChat App and are now logging in on PC, or vice versa) a notification will pop up to try and verify your additional device. Example is shown below from PC when phone was logged in first. Select “Continue” to begin verification.
A QR code will appear that can be scanned by phone. You will get a popup directly from the LamChat App asking if you want to scan the QR code.
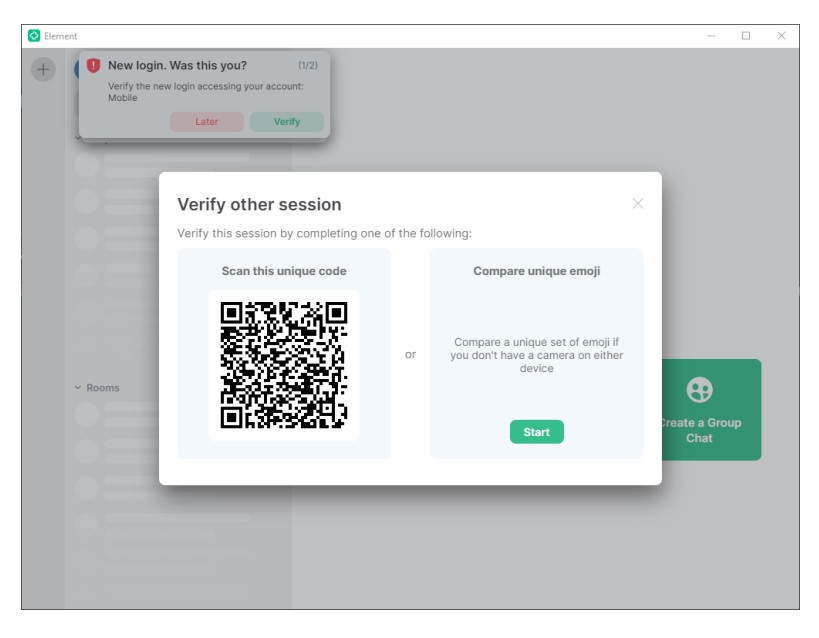
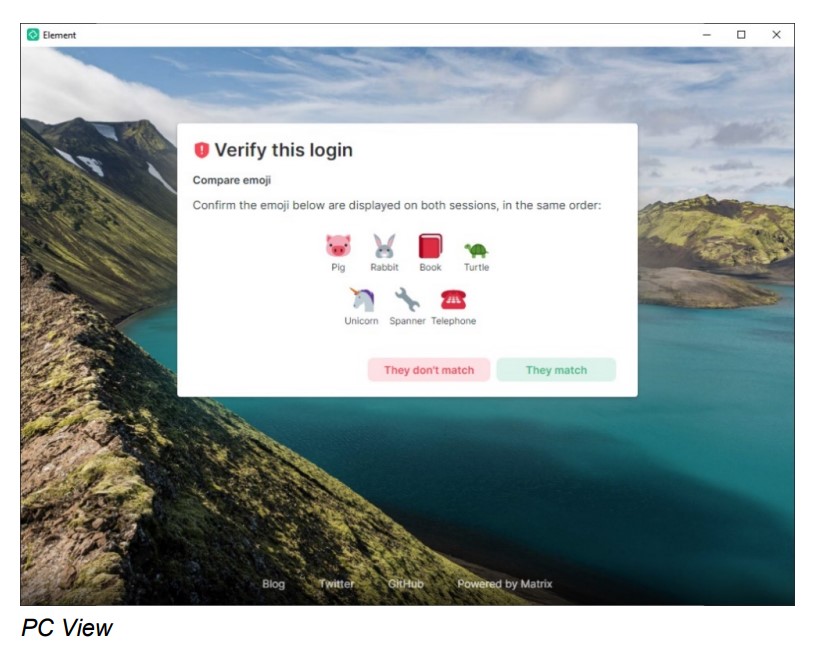
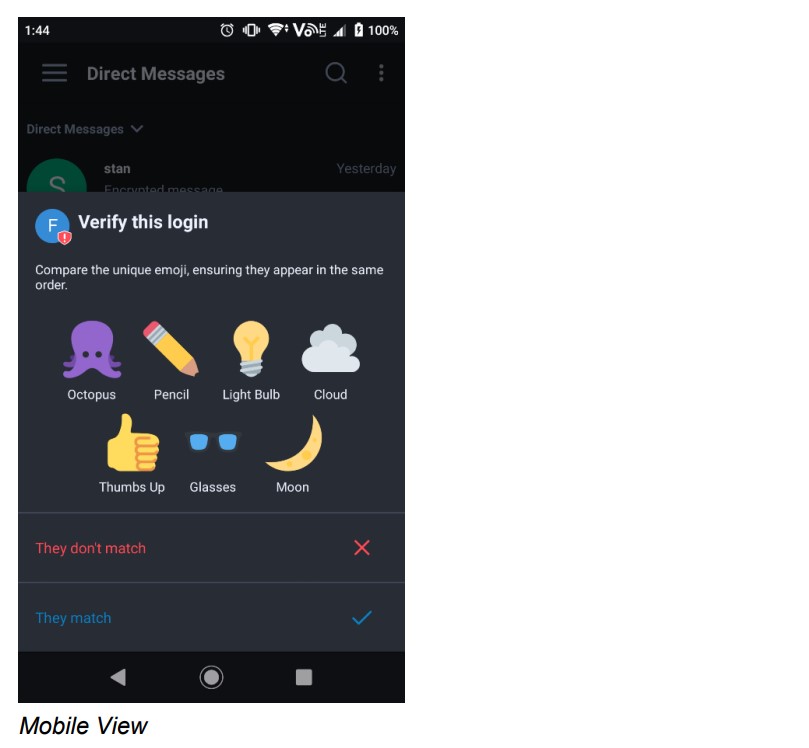
If you are unable to scan the QR code you can verify the login with “Compare Unique Emoji”. A unique sequence of emojis will be displayed on both devices, so you can compare them to verify.
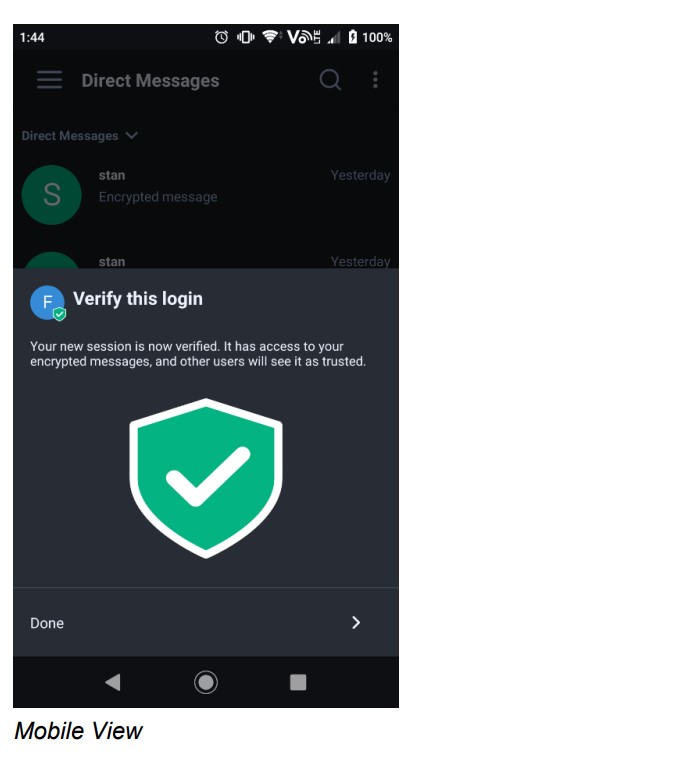
Once verified both devices will show a green shield. Select “Yes” and “Got It”.

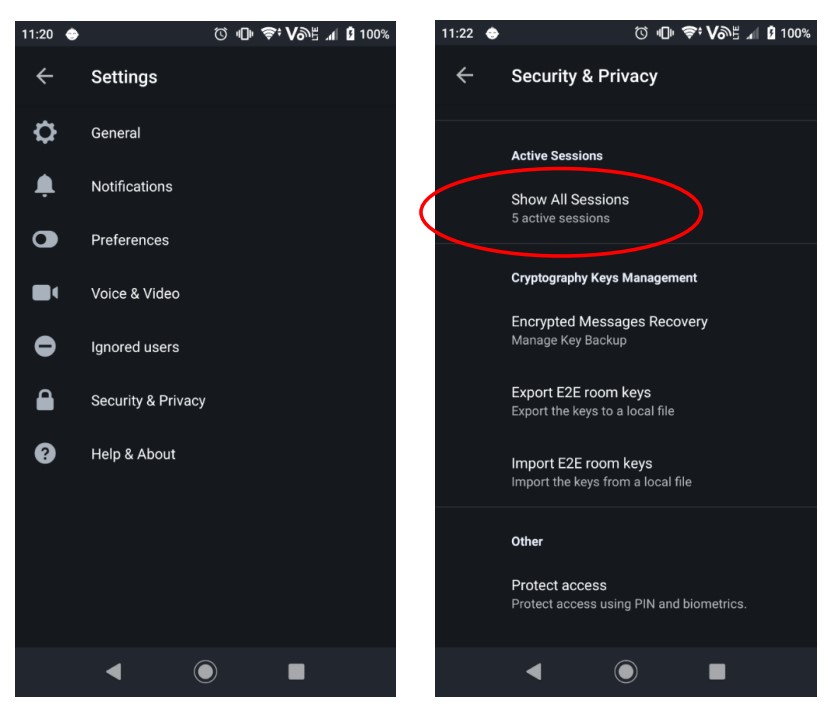
Verified sessions can be checked in “Settings” within “Security & Privacy”. Then scroll down to Show all Sessions” and select.
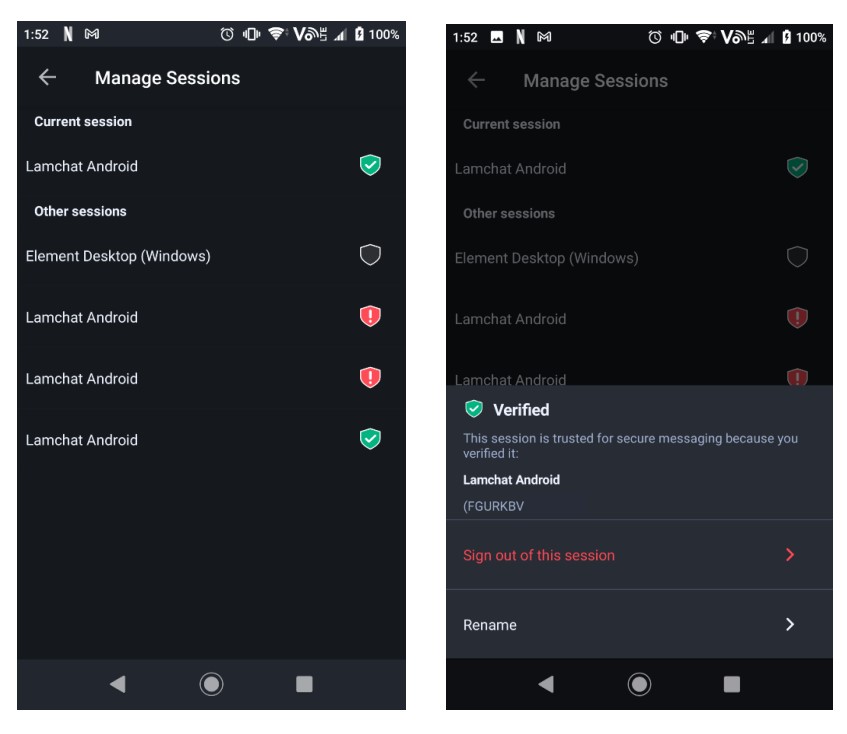
This will open the “Manage Sessions” page as shown below. You can see in this example there is four Android mobile devices connected with this LamChat account. Two are verified, two are not. If you select on the verified Android, it will appear as below providing you details of the device.
8. Secure Backup
As LamChat is a secured application there is a process involved with keeping your device encrypted, whilst still being able to access your data, that is your messages and conversations.
To create a backup, you will have to create a backup of your encryption keys (before logging out of your devices) by following the Encrypted Messages Recovery Process.
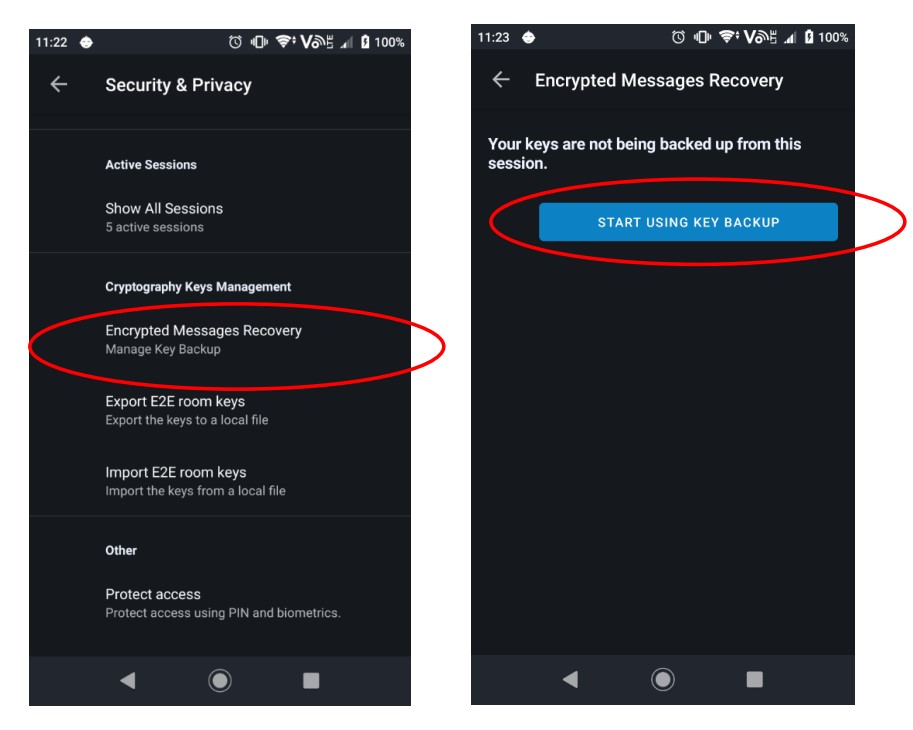
Open “Settings”, select on “Security & Privacy”, the screen will appear as below.
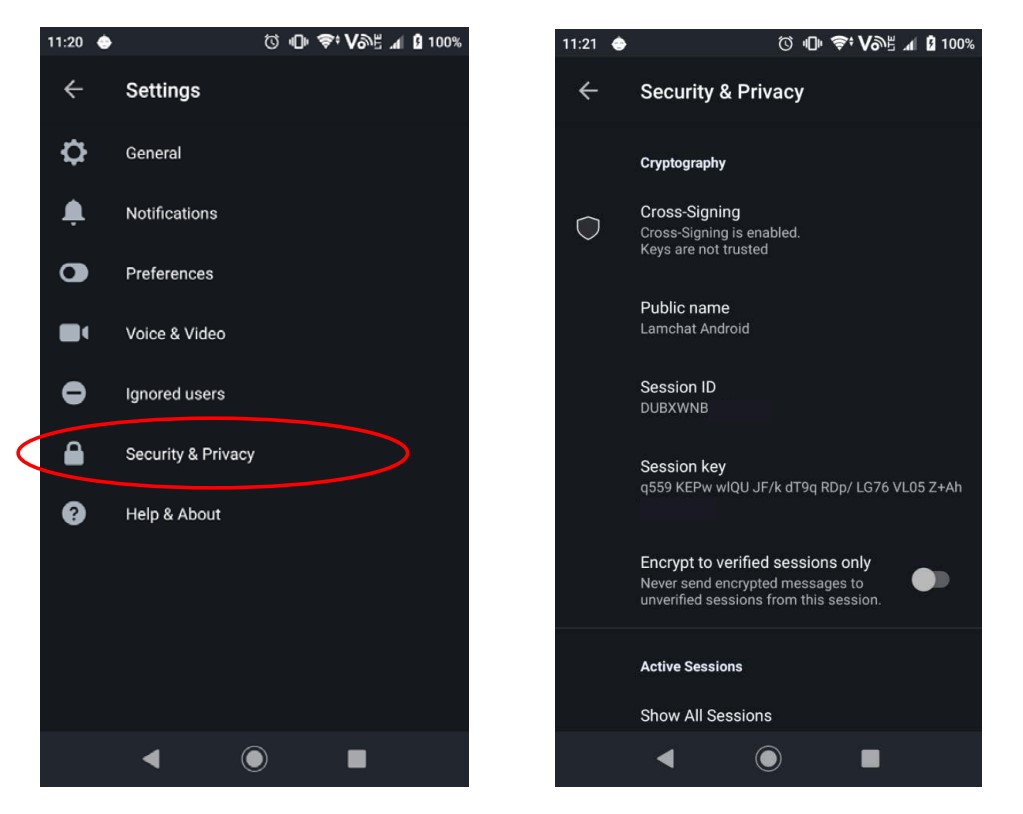
Scroll Down to Cryptography Keys Management and select on “Encrypted Messages Recovery”. Select “Start Using Key Backup”.
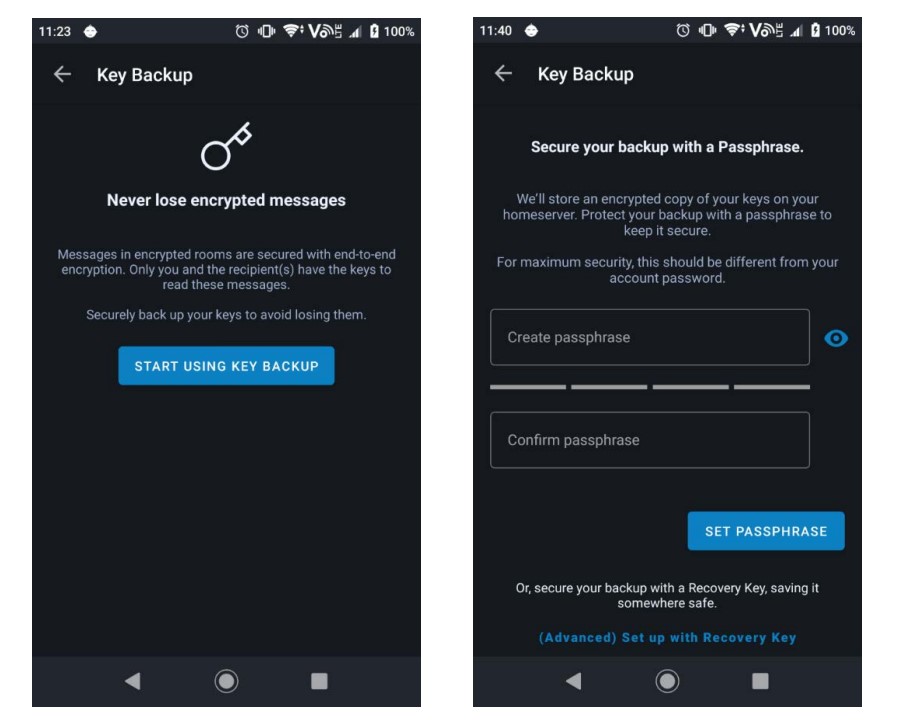
Select “Start Using Key Backup” again. This will take you to create a Passphrase. Enter the passphrase (essentially another password so ensure you remember this). Then press “Set Passphrase”.
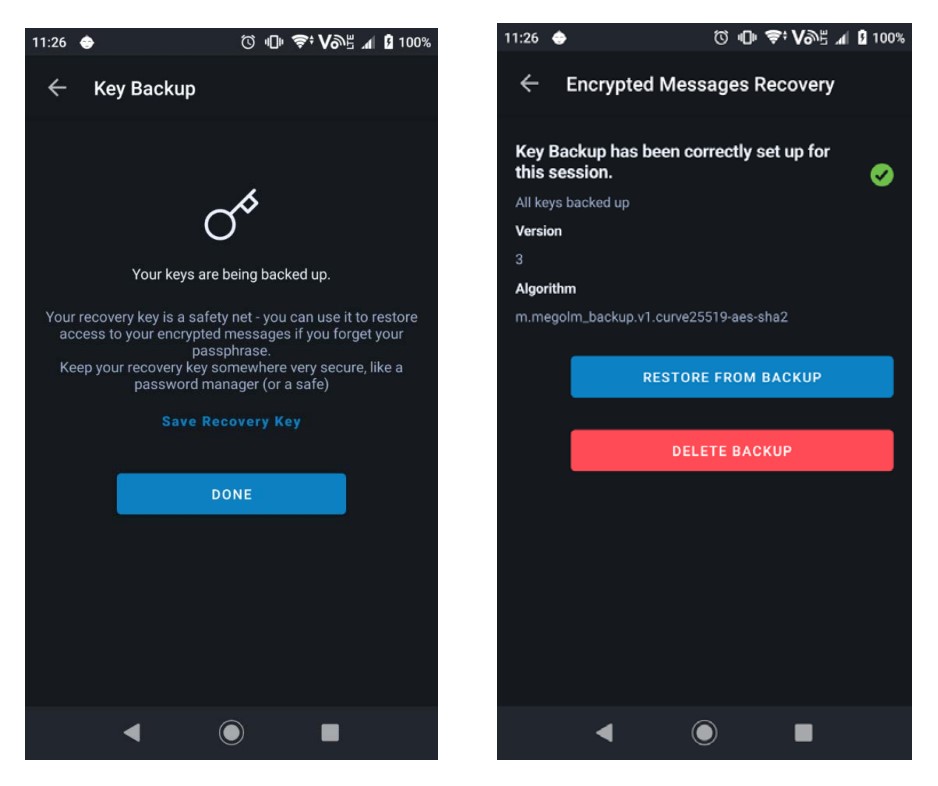
This will now backup your keys. You will also need to save your Recover Key somewhere secure as requested below. You will need both your Passphrase and the Recovery Key to access your Secure Backup. Once completed select “Done”. This should return you to the Encrypted Messages Recovery Page with a Confirmation that your Key Backup has been setup correctly. Should you ever need to restore from Back Up return to this screen and select “Restore from Backup”.
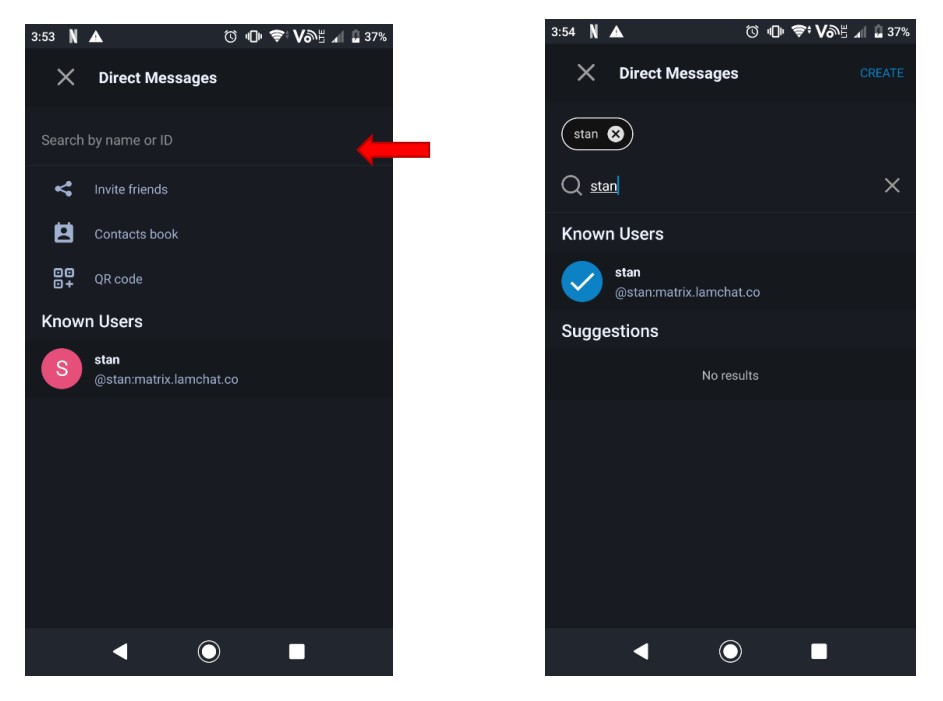
8.0.1. Search by Name or ID
Enter the username of your friend or the User ID, which is the username with the extension “@example:matrix.lamchat.co”. For example, if my friend’s username is “stan” his User ID would be @stan:matrix.lamchat.co . Please remember that Usernames/User ID’s are case sensitive.
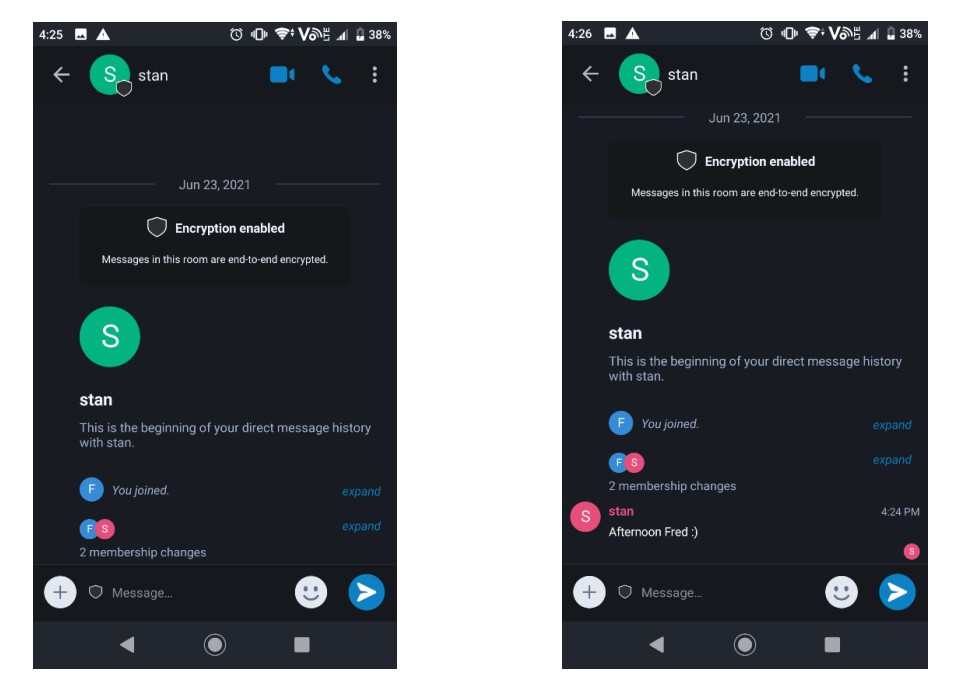
Select the Contact you want to add, and it will then open your Direct Messages conversation with them. Here you will see a record of your invitation and who you invited. The Contact you have started the conversation with, has to accept the invitation to the Chat.
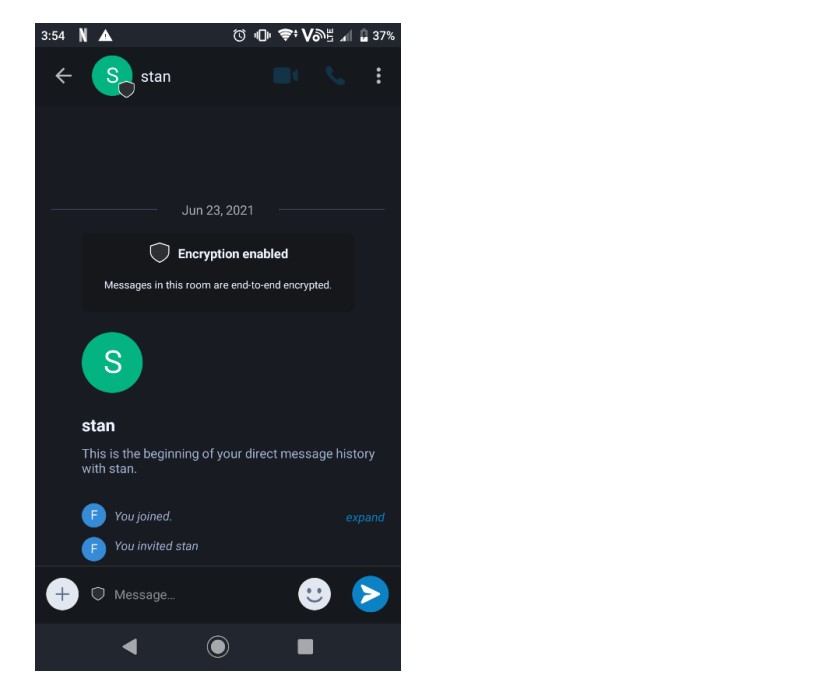
The status will update again once the other user has accepted and then you can begin messaging each other as shown below.
8.0.2. Invite Friends
Invite Friends allows you to share a link with other people (via various mediums including but not limited to text messages, emails, messenger etc) to assist them in signing up to LamChat. It also assists them in adding you as a Contact without having to provide your Username or ID.
8.0.3. Contacts Book
Contacts Book imports your contacts from your phone and allows you to search a Contact in LamChat by using their email address. Whilst this is useful it is limited by the assumption that they have set up their account with the email you have on record.
8.0.4. QR Code
QR Code takes you directly to a camera screen that will allow you to scan someone else’s QR Code which will automatically start a chat with them. It allows you to add each other as a Contact without having to provide your Usernames or ID’s.

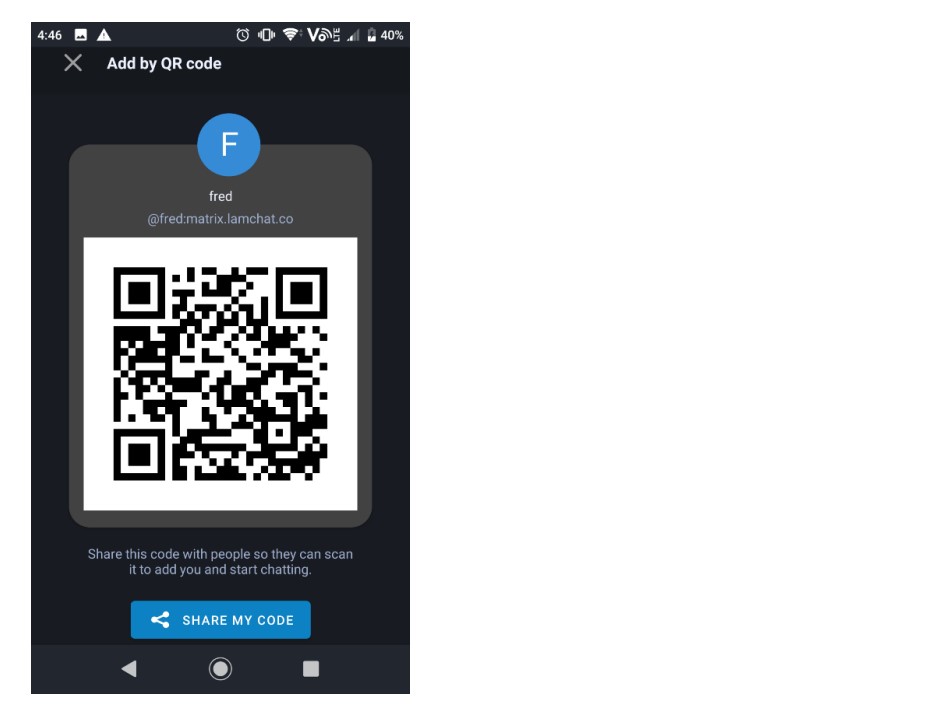
8.0.4.1. Where to find my QR Code
When in Direct Messages or Rooms there is a profile button in the top left hand corner which appears as three horizontal lines. When you select this, it takes you to your profile pane. Next to your User ID is a symbol with three cubes as shown below.
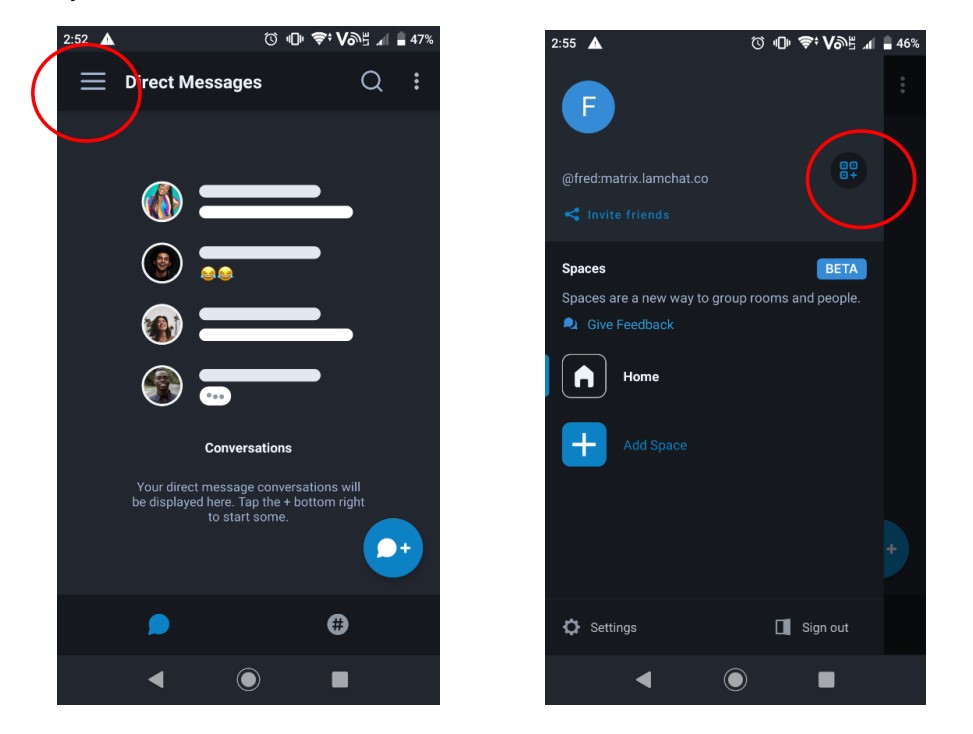
When you select this symbol, it will produce your personal QR Code as shown below. This is a static QR Code so if you share it, it will stay current.